The Windows 10 has a special feature called Ransomware Protection safeguard your system from the attack. Ransomware is a type of dangerous malware that is quite a threat to your computer files and documents. It works by encrypting your files and system and demands a ransom to give you back the files. Falling prey to their demands is not the rightmost thing to do since paying them does not mean they would give you back the key to decrypt your files. They usually ask for Bitcoin payments.
It is, thus, of utmost importance to protect your files from being targeted by hackers. Windows 10 has the in-built mechanism to help you, but they are not automatically enabled in your system.
It is to be noted that if you are using some third-party antivirus program other than the Windows Defender program, then you may not be able to use the ransomware protection feature offered by Windows.
In this post, we will explain the steps in detail to activate ransomware protection in Windows PC.
Quick Overivew
Methods to Enable or Disable Ransomware Protection in Windows system:
If you do not want to use any other antivirus software but instead want to go with the Windows 10 antivirus option, there are two things you might want to set up in your system.
- Controlled Folder Access
- One Drive Backup
Enable or Disable Controlled Folder Access:
Let us see how to set up the Controlled Folder Access first, followed by learning how to set up the One Drive backup on your PC in the latter segment of the article. If you are enabling Controlled Folder Access on your Windows PC, then it is recommended to have your One Drive PC backup set up for your convenience.
We will show you three ways to enable or disable the Controlled Folder Accessin the below segment.
Method 1: Using Windows Defender Security Center
Follow the steps given below:
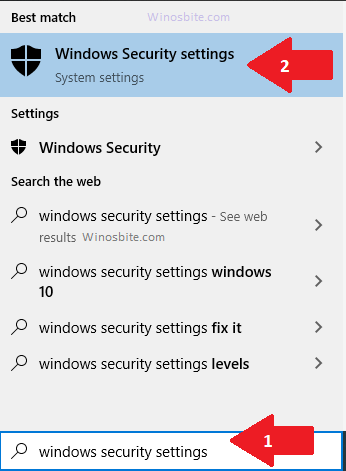
1) Press the Windows button, type Windows Security Settings and click on it


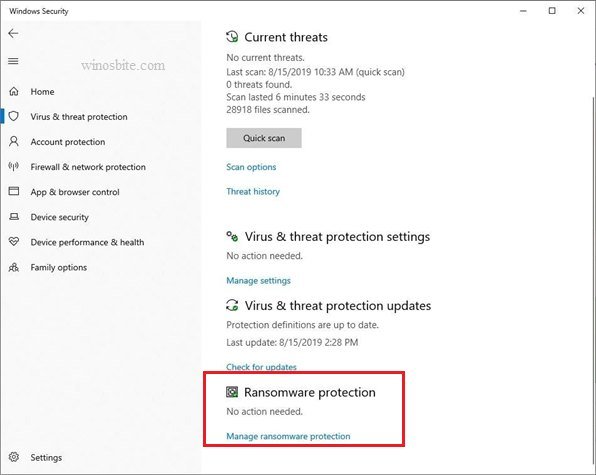
2) Click on Virus & Threat Protection


3) Move down until you can find out the Ransomware protection and then click on the Manage ransomware protection


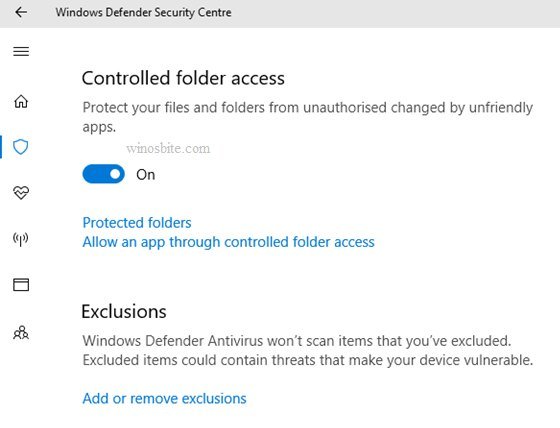
4) You have to turn on the toggle button of Controlled Folder Access and then hit the protected folders
Note: – To turn off the Ransomware protection, simply switch off the Controlled Folder Access.


5) Click on “Yes” when prompted by the UAC to approve the request.
To disable it or turn it back, click on the toggle button located under Controlled folder access
All the users have added to the list automatically like the documents, pictures, videos, and Windows system folders. If there are some other folders where you keep files that need protection, then simply tap on the “add a protected folder” option and move on to the folder you want to protect.
Once all the necessary folders are added, you can click on the back arrow and scroll down to check if the Ransomware data recovery is appropriately functioning.
Further, you can allow different apps and games to access the Controlled folders in your Windows 10 system by permitting and adding those apps and games.
Method 2: Enabling Controlled Folder Access in PowerShell
Below are the steps to enable Controlled Folder Access with the help of PowerShell commands.
- Click open the “elevated PowerShell.”
- Write the command given below into the elevated PowerShell and then hit the Enter
To enable the Controlled Folder Access that will safeguard from Ransomware attack, follow the below steps
1) Type Command Prompt in Window search and choose Run as administrator


2) Enter below exact text in command prompt and hit enter to enable the folder access
Set-MpPreference -EnableControlledFolderAccess Enabled
3) To disable the Controlled Folder Access, write the below command:
Set-MpPreference -EnableControlledFolderAccessDisabled
Once done, then you close the command prompt.
You may also use free Anti-ransomware tools in case if your system is already infected.
Method 3: Using Local Group Policy Editor
Now, in this step, we tell you how you can use Local Group Policy Editor to enable or disable Controlled Folder Access.
It is to be noted that the Local Group Policy Editor is accessible only in Windows 10 Pro, Education editions, and Enterprise.
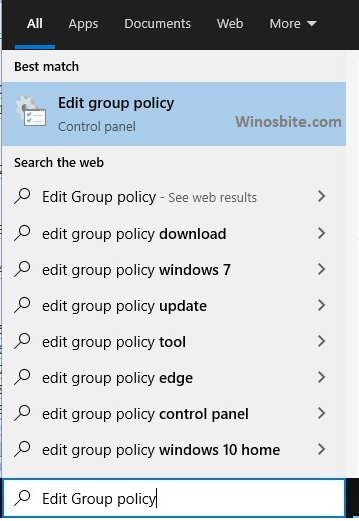
- Press Windows button, type Edit group policy and click on it


- Navigate to the below-mentioned location from the left side of the panel.
Computer Configuration>Administrative Templates>Windows Components>Windows Defender Antivirus>Windows Defender Exploit Guard>Controlled Folder Access
- From the right-side panel of the Controlled Folder Access in the Local Group Policy Editor, click the Configure Controlled folder access policy to edit it.
- First, choose Enabled and then Block from the “Configure the guard my folders feature,” context menu. Further, tap “OK.”
- If you wish to disable it, then select the Disable(Default)option from the “Configure the guard my folder feature” and click “OK.”
- Finally, you can close the Local Group Policy Editor.
Setting up the One Drive Backup
One Drive is one of the best way to backup your data in case of Ransomware attack. One Drive Backup is a file syncing system that can make your files available in all other systems. One Drive can auto copy new files on your Desktop, Documents and Picture folder if you have enabled folder protection in them. As soon as you delete a file from your synced folder, it will get deleted from your One Drive folder too.
Once the final checks are done, you can then sign into One Drive if you’re not already signed in. Click on the pop-up window and enter your email address and password and sign into your Microsoft account.
Now, if Folder protection is not already enabled, then you can do so by following the below steps:
- Click on the One Drive icon in the notification section on the Windows 10 taskbar.
- Click on more and then click on the Settings
- A new window will appear where you have to press the Backup
- Press “Manage backup” and then click on “Start backup.”
- On the same tab, you can automatically create a backup for your photos and videos stored on the devices that you connect with your laptop and Windows computer.
Conclusion
Thus, these steps ensure that the Windows 10 ransomware protection is enabled completely in your system. You can use any of the above methods to enable or disable the Controlled Folder Access to obtain ransomware protection without using any third-party tool anti-ransomware tool.
