In general, we turn off the keyboards under two circumstances – when we are cleaning our keyboard while the system is still on or when there is a keyboard malfunction.
Turning off the keyboard is not something we do every day and this is not something that we would even do accidentally. But, sometimes if we have to do it, then the process of turning off and on of the laptop keyboard needs to be known.

So, first let us tell you how to turn off the laptop keyboard.
Quick Overivew
Ways to turn off the Laptop Keyboard
When your keyboard is disabled, you can clean, wipe, touch or even change the malfunctioned keys on the keyboard.
Find out the below two ways in which the keyboard can be disabled in Windows 10/11.
First Solution: This process is also a way used by many to disable the keyboard permanently.
By this process, you can turn off Windows capability of auto installing the keyboard, every time you are rebooting your machine.
Method 1: To remove the keyboard permanently:
Step 1: From the Start menu, click on the search box and type, “gpedit.msc”
Step 2: Click on the Computer configuration located on the left side, and then move on to the Administrative templates.
Step 3: From the templates, click on the System option and then select the Device installation option.
Step 4: Further move on to the Device Installation Restrictions.

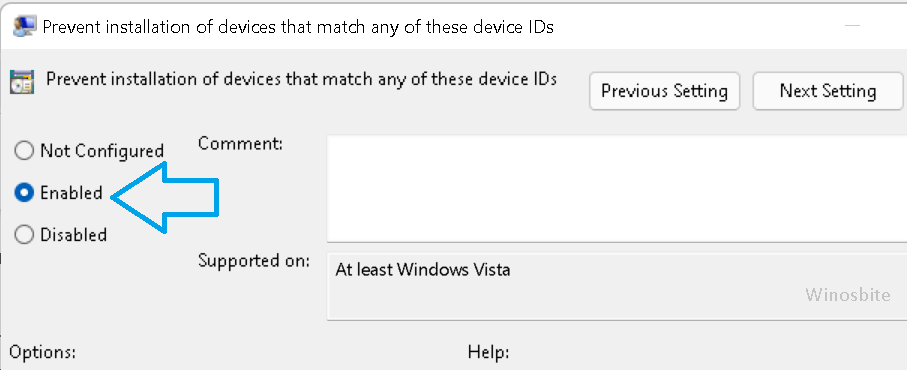
Step 5: From the numerous options that appear on the right, choose “Prevent Installation of Devices not described by other policy settings.”
Step 6: Select the enabled checkbox from the option settings.
Once you are done with the aforementioned steps, you can follow the below steps to uninstall the keyboard.
Method 2: Use the Device Manager option to disable the keyboard.
Step 1: Search for Device Manager in the search box of your Start Menu.
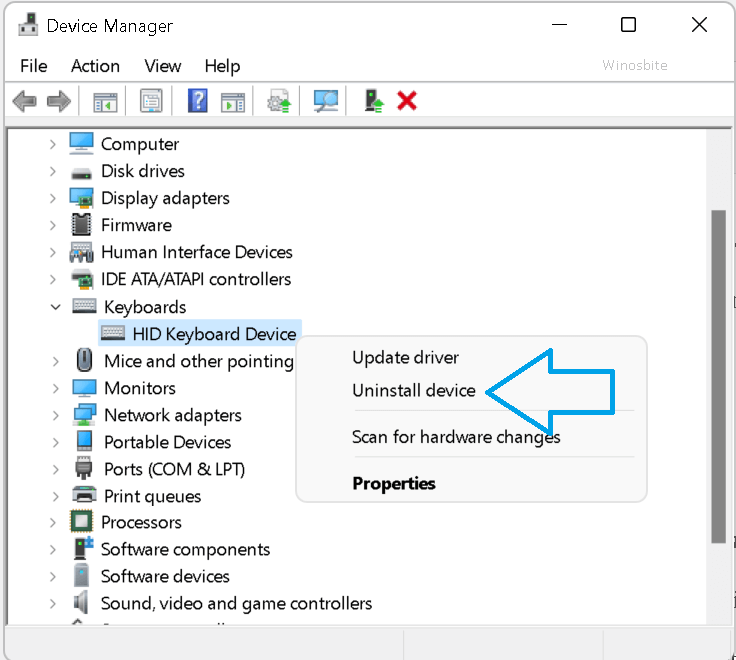
Step 2: Find the Keyboard section from the Device Manager and tab to expand it
Step 3: Select the Keyboard you want to disable.
Step 4: Right click upon it to check on the available options.
Step 5: Click on disable the keyboard option.
Step 6: In case, this option is not available you have to click the uninstall option instead of it.
Step 7: When a pop up asks you to confirm if you want to disable it, then click on the Yes option.
This process should be disabling your keyboard. Once you complete all the above steps, now your system will not install the keyboard automatically, once you are rebooting the machine. Consider using free virtual keyboard on Windows.
Solution 3: Update the incorrect driver for disabling the keyboard.
Though updating the device with an incorrect driver is not a very appropriate way to disable the keyboard, yet this is another option that can be used by you to disable the keyboard permanently.
With an incorrect driver, the keyboard would stop functioning altogether.
Step 1: Type Device Manager in the search box beside your Windows icon on the lower left corner of your screen.
Step 2: Select Update Driver by clicking on the keyboard option.
Step 3: Choose Browse my computer for driver software.
Step 4: Next choose, Let me pick from a list of available drivers on my computer.
Step 5: Now choose Show compatible hardware and deselect it.
Step 6: From the dropdown, choose a manufacturer (other than your standard keyboard) and choose a model and then click Next.
Step 7: Tap Yes.
Step 8: Choose the option, Close once the driver is updated.
Step 9: Choose Yes to reboot your system.
Step 10: After you reboot, your in-built keyboard won’t function.
If you want to enable it again, follow the same steps given above and just select back the manufacturer and the model from the dropdown menu.
Step 11: Select Search automatically for updated driver software.
Step 12: Close the dialog box that says Windows has successfully updated your drivers.
So that now you have learnt ways to disable the keyboard, let us see how you can re-install it back.
If you have disabled it by mistake, or once you have finished cleaning your keyboard, it’s time to put it back. Here is how to disable keyboard’s light on Windows.
How to re-enable your keyboard on your system?
Different laptop models might have to follow different ways to re-enable the keyboard. In some you just have to hold the shift key for some ten seconds to reinstate the keyboard, it’s that simple.
However, not for all of the systems it is that simple. So, below we would show a common way to re-instate the keyboard and this way will mostly work on most of the laptop designs around you.
Solution 1: Enable Keyboard Option from Control Panel by using the below steps.
Step 1: For this procedure, you must open the Control Panel of your system.
Step 2: Press the Start button on your laptop, and you will find the Control Panel listed in it. Those who use Cortana can ask for the Control Panel.
Step 3: Tab on the Device Manager to open it.
Step 4: From the Device Manager, tab on the Keyboard option.
Step 5: Click on Enable Device from the Keyboard option.
Check if your keyboard is up and running.
If you do not remember the way you used to deinstall it then using the first solution might restore it however, if not then follow the below steps.
Solution 2: Update the Keyboard Driver either manually or by using an automatic driver updater software using the below steps.
Manually updating the Keyboard Driver
- Open the Control Panel from your computer.
- Click on Device Manager to open it.
- Choose Browse my computer for driver software.
- Next choose, Let me pick from a list of available drivers on my computer.
- Now select Show compatible hardware and re-select it.
- From the dropdown, choose a manufacturer (other than your standard keyboard) and choose a model and then click next.
- Tap Yes.
- Choose the option, Close once the driver is updated.
- Choose Yes to reboot your system.
- After you reboot the in-built keyboard you have should start functioning.
If you’re not so computer savvy, you can instead choose a driver updater and install the same on your system. A good driver updater will help you find the right versions and would update them accordingly.
Wrap up
To finally close this discussion, we can say that using any of these steps can help you uninstall and re-install the keyboard.
So, now that you know what you have to do you can learn it up yourself and use it as and when you need it whether it is during cleaning the keyboard, or to change a key in a ill-functional keyboard.